In my last couple of posts I’ve talked about the hardware and software behind my birdhouse camera project. I haven’t previously covered how I’m giving it all enough power to operate, and therein lies a tale.
No Power? No Problem
If I had a power outlet located anywhere near the bird house, this would have been easy. Pretty much any micro-USB power adapter would plug into the Raspberry Pi, and I’d be set. Those have been standard with about a billion USB-powered devices and are so common that I have more than I can use.
But I didn’t have that. What I did have was a lot of sunlight. Solar seemed to be the answer.
Besides the obvious need for a solar panel, I planned to include a battery. It’s not always sunny here, though it sometimes seems that way. Plus, I expected to want to start taking pictures before the sun rose in the morning and woke up the panels.
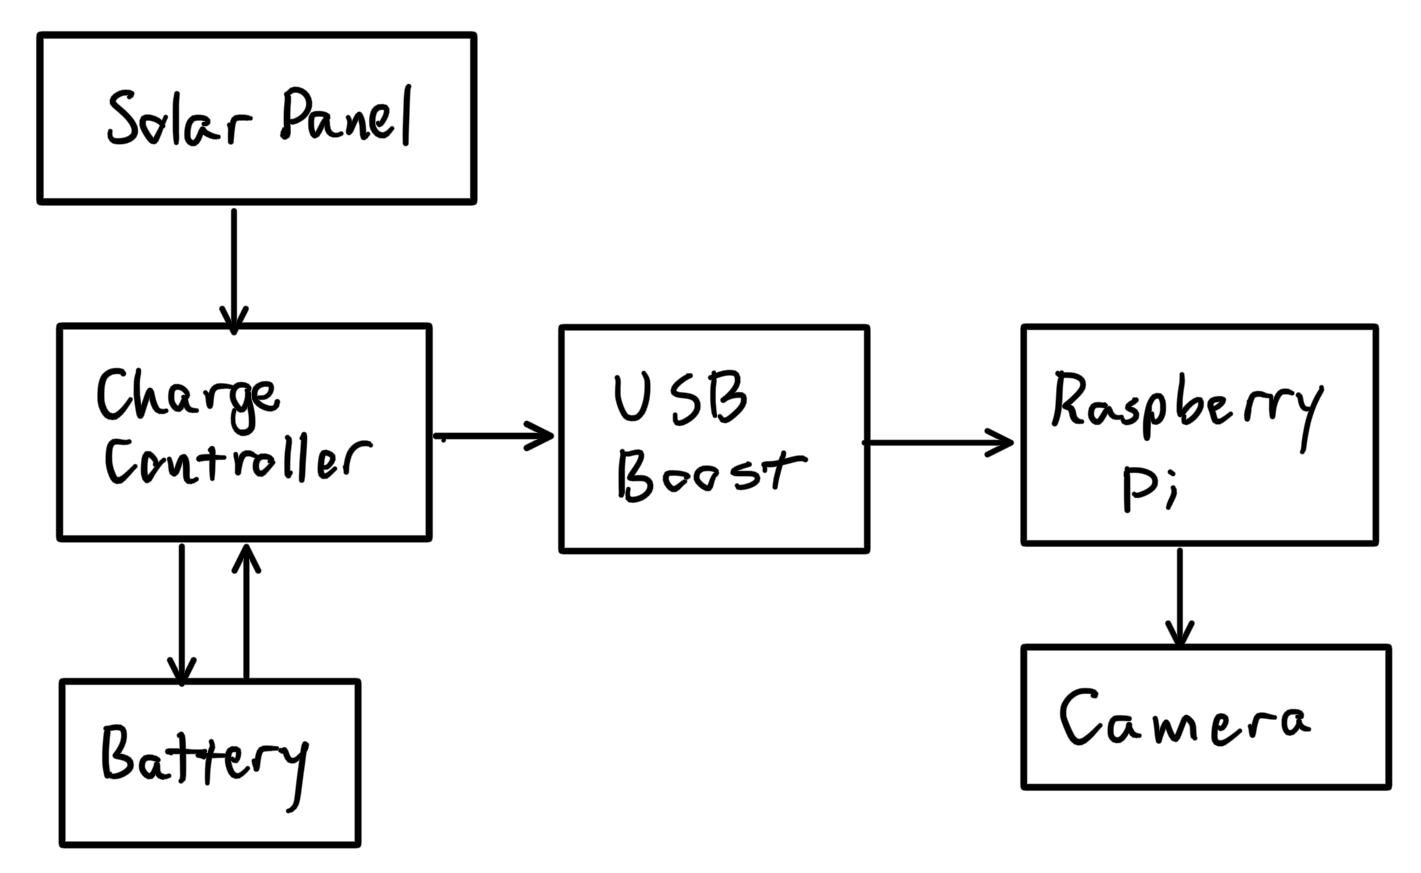
So, a solar panel, a battery, and the Raspberry Pi. How could I connect all three? After looking around a fair bit I decided on Adafruit’s solar/USB battery charger board, which is designed for this exact need. Power input comes from a solar panel or DC input (via USB), and it manages charging a battery and driving a load. When the power input is off, it uses the battery as long as possible.
Lacking details on how much power I’d need to power the Pi, I made what I hoped were reasonable guesses on panel and battery size. The battery is a 2500 mAh Li-Po, and I went with a 6V, 2W solar panel. Two watts is pretty low but I hoped that between a lot of sunlight hours and a hopefully-low power drain I’d be able to keep the system going.
Extra bits and pieces
A couple of smaller related items that proved crucial:
- The cables on Adafruit’s solar panels are only a few inches long, and I knew the bird house would be shaded by the eaves of my house. Fortunately I found a 2.1mm barrel jack extension cord that gave me a lot more flexibility in panel placement.
- Since I’m relying on guesses for both panel on battery sizes, I ordered a USB-A to 2.1mm barrel jack adapter cable. If the solar setup wasn’t working out, I could disconnect the panel and power things temporarily with a USB external battery pack– which I conveniently already had.
What’s that sound?
Initial testing went OK. I wasn’t pushing the limits, but the components worked together as expected, and that helped confirm my design wasn’t completely off the rails.
Then one afternoon, as the sun was going down, I went into my office and heard an unfamiliar high-pitched sound. I narrowed it down to the Pi/solar/battery setup which was then sitting on my workbench. What the…? But…moving the solar panel into better light made the sound go away.
It seems that in low light situations, the charge management board can’t provide a stable voltage to the Pi, so it oscillates. I don’t know which part was making the sound, but oscillation was enough to be audible. The birds wouldn’t like that.
To stabilize things, I added a PowerBoost 1000 to the design, between the charge manager and the Pi. It’s designed to take variable input and provide stable output, and indeed it did. The system was now quiet.
With all of this in place, a high level block diagram showing power flow looks like this.
So how did it work out?
Initially, it was kind of hit or miss.
One still-unsolved issue is that I don’t have a good way to measure the battery charge. I don’t know what it is, and I can’t accurately guess how long it will last at any given time. Also, though I know the solar panel’s rating, I don’t know how much of the time it’s able to approach that rating. It’s probably less than the rated value a lot of the time, depending on weather, shade, and angle of the sun.
These have made debugging things kind of challenging since I can’t tell if something’s going wrong until the Pi shuts down due to lack of power.
This happened a few times, always with the Pi dead first thing in the morning. I worked out that the battery lasted a good long time when fully charged, so I decided that I had under-specified the solar panel. We get a lot of sun here but not so much that a 2W panel can keep this all going. Depending on weather, it might keep going for two or three days, but running out of power was pretty much inevitable.
I swallowed the cost and upgraded to a 6W panel, which has drastically improved things.
That’s not all of it though– the solar panel was mounted vertically on the side of the house. I knew that probably wasn’t the ideal angle, but I didn’t know how important that might be. It turns out to be really important. I’ve improved things by mounting the panel on a freestanding wooden frame that lets me move it around and adjust the angle easily. It could probably be even better. It’s been working reliably for a couple of weeks now though, so I’m hopeful that it will continue to work out until the birds move out. I’m still keeping an eye on it and making occasional adjustments, though.

Parts List
As in my previous post, everything came from Adafruit. My power setup uses:
- Huge 6V 6W Solar panel, with the 3.8 / 1.3mm or 3.5 / 1.1mm to 5.5 / 2.1mm DC Jack Adapter Cable, that’s really necessary.
- [Adafruit Universal USB / DC / Solar Lithium Ion/Polymer charger](# Adafruit Universal USB / DC / Solar Lithium Ion/Polymer charger)
- PowerBoost 1000 Basic - 5V USB Boost @ 1000mA
- Lithium Ion Polymer Battery - 3.7v 2500mAh
- 2.1mm female/male barrel jack extension cable - 1.5m, to give me flexibility in locating the panel.
- USB to 2.1mm Male Barrel Jack Cable, so I could connect external power when needed.
- Plus various connectors, JST and other types, to plug everything together, and solder when they didn’t plug the way I needed them to.
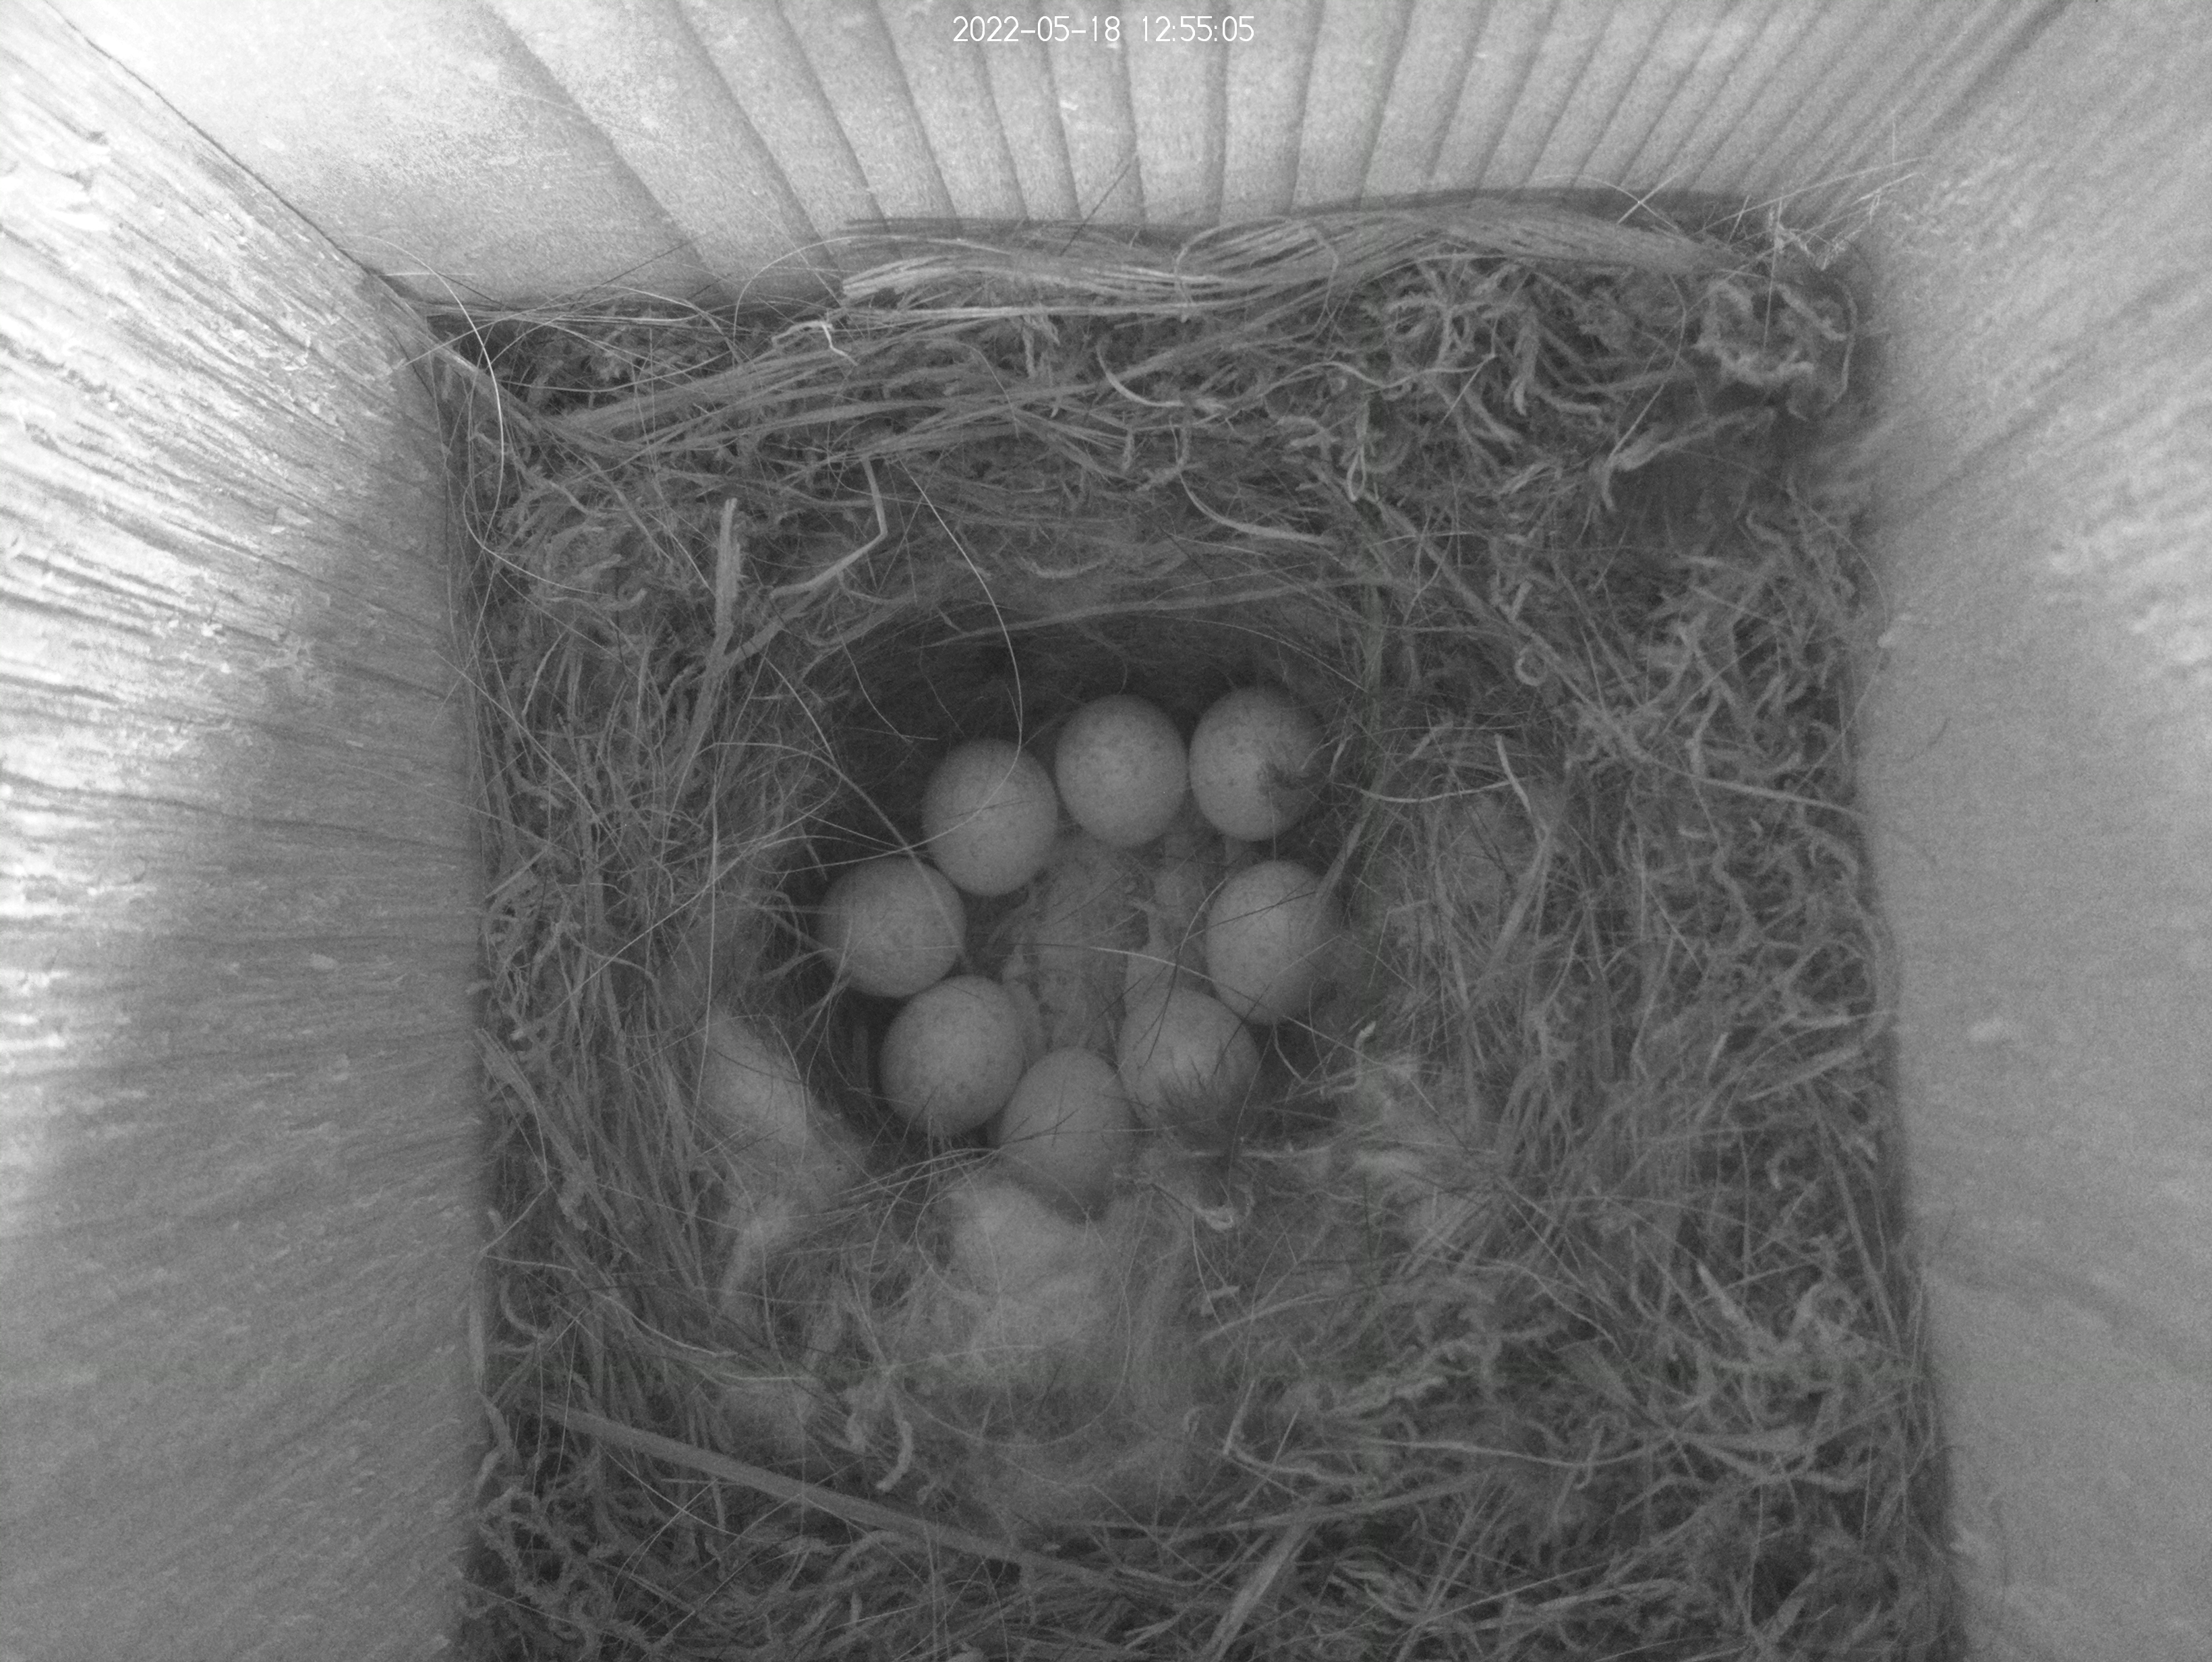
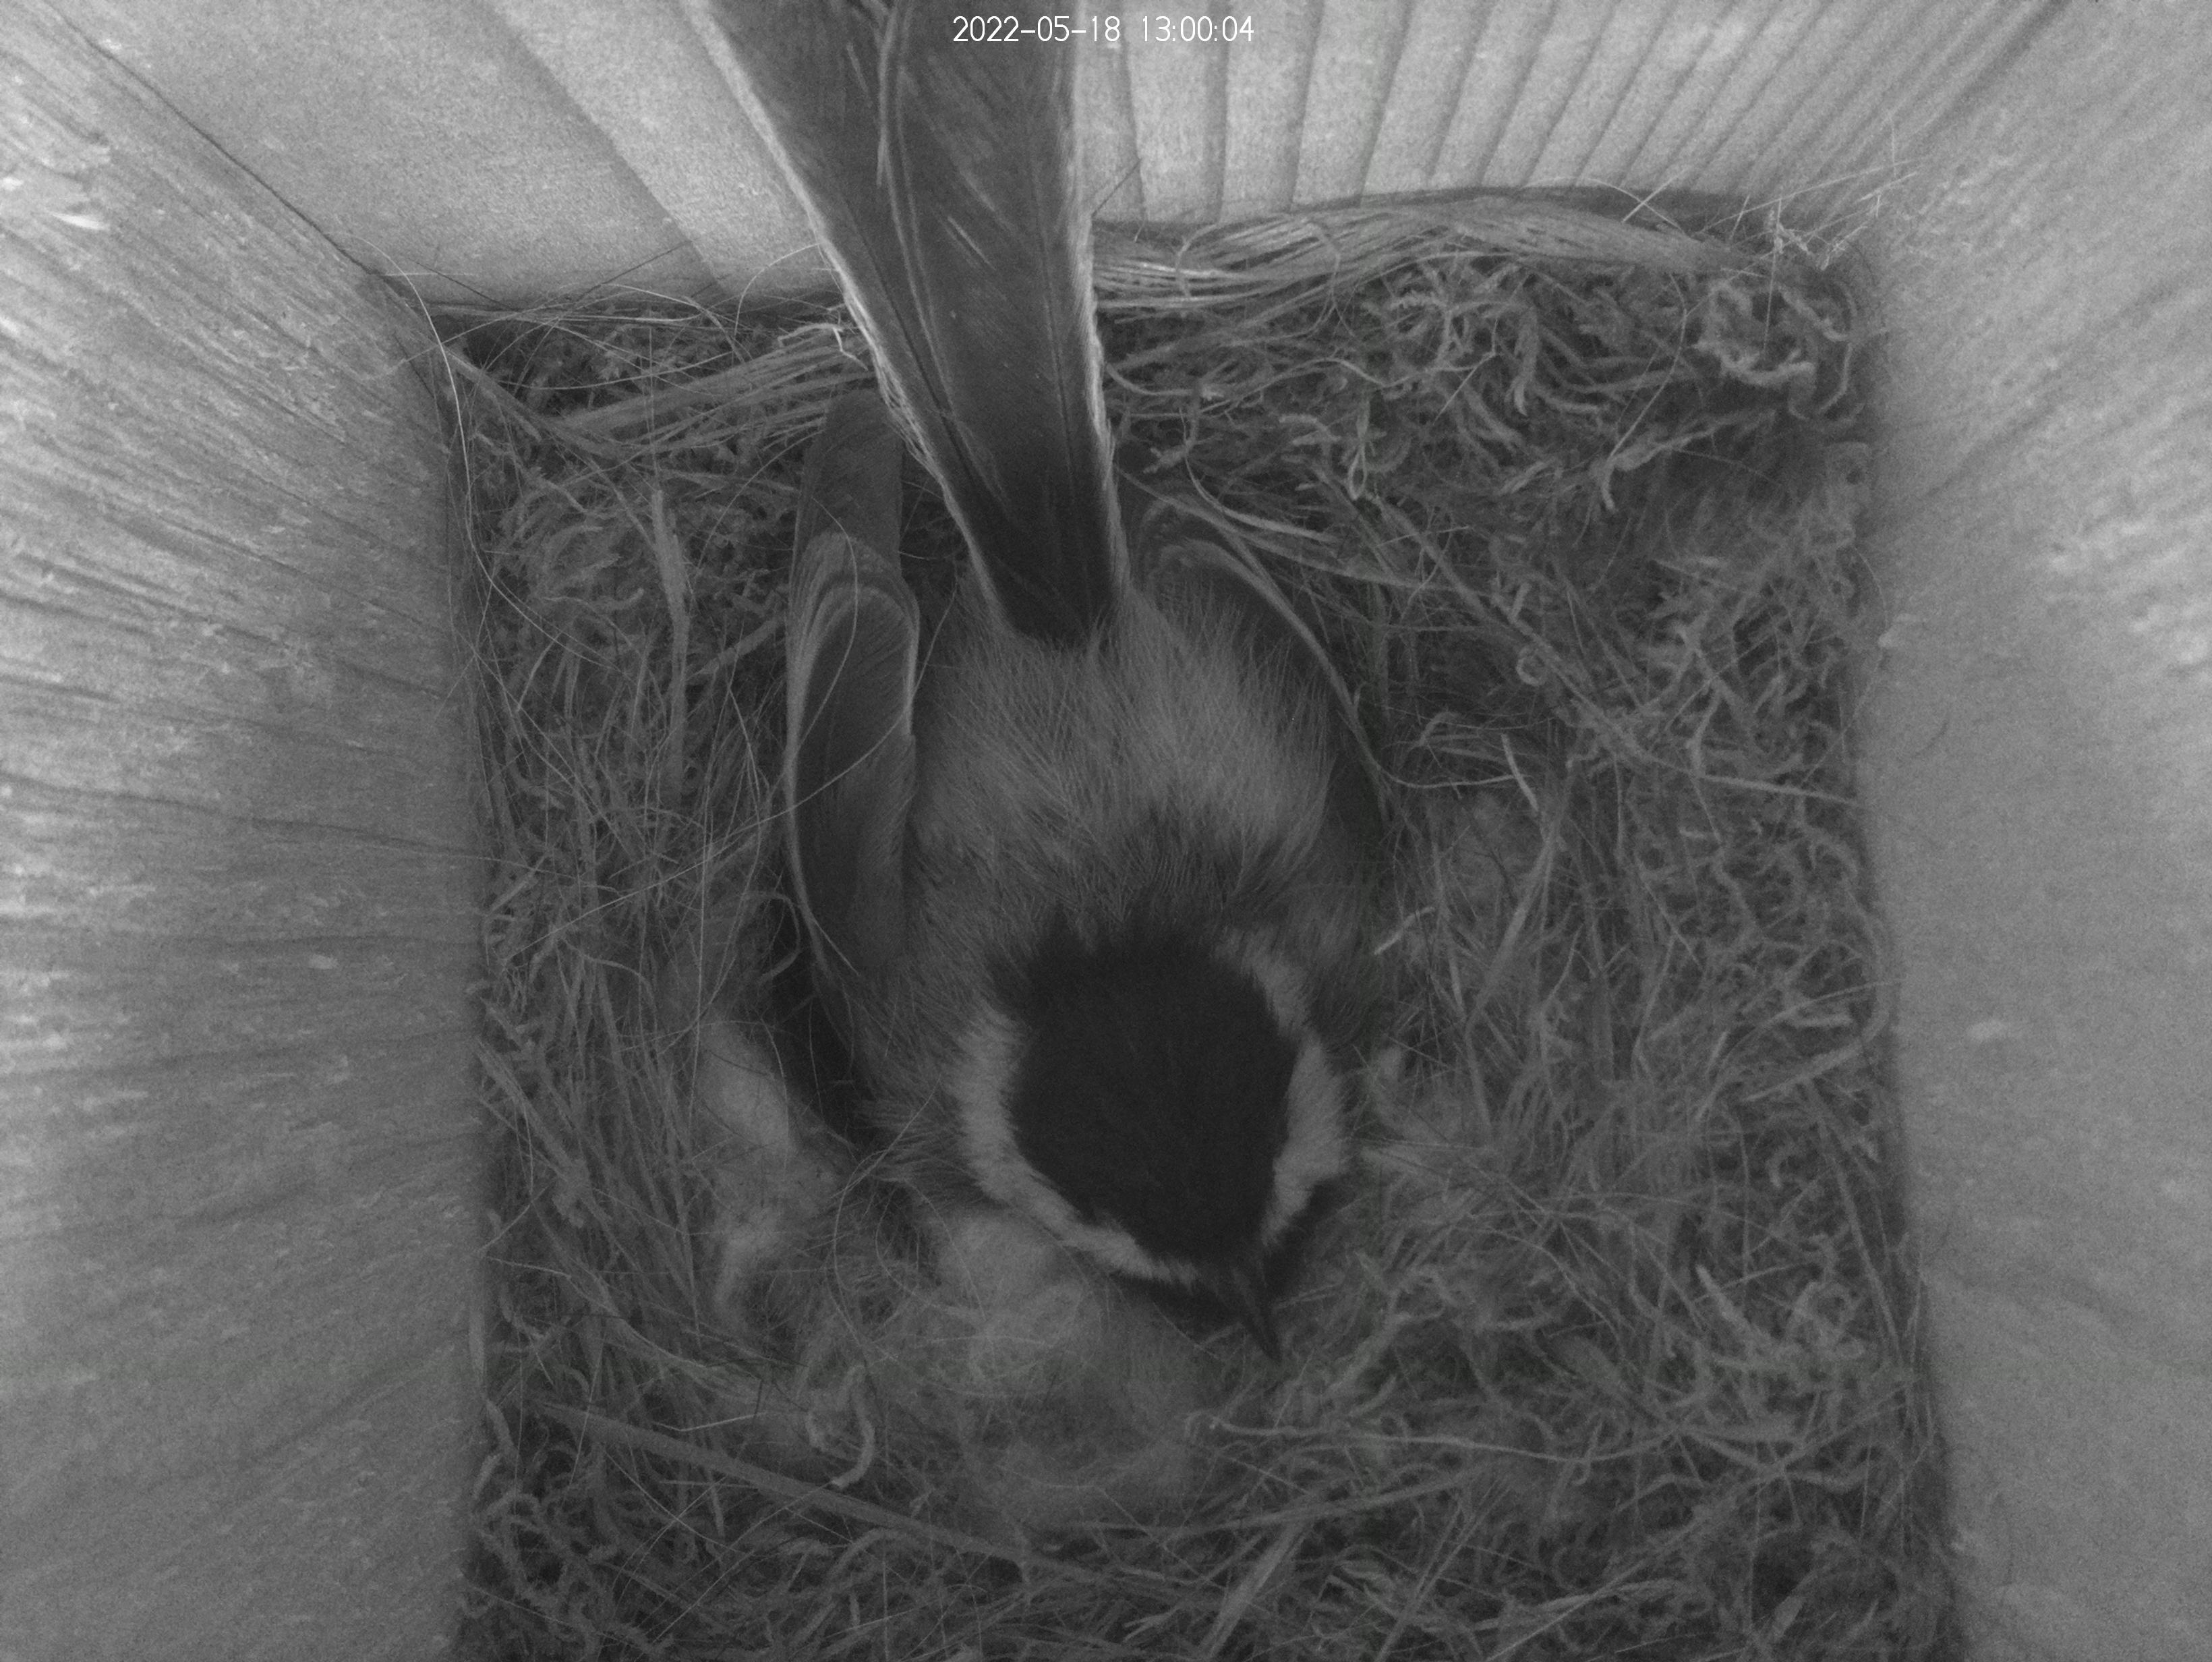
Springtime Guests
As of today a pair of black-capped chickadees have settled in. From May 4 through May 11 they laid an egg a day. In another week or so they should begin to hatch! I’ve been posting pictures on my various social media accounts (which you can find linked over in the sidebar), and I’ll keep doing that until the birds are done for the season.